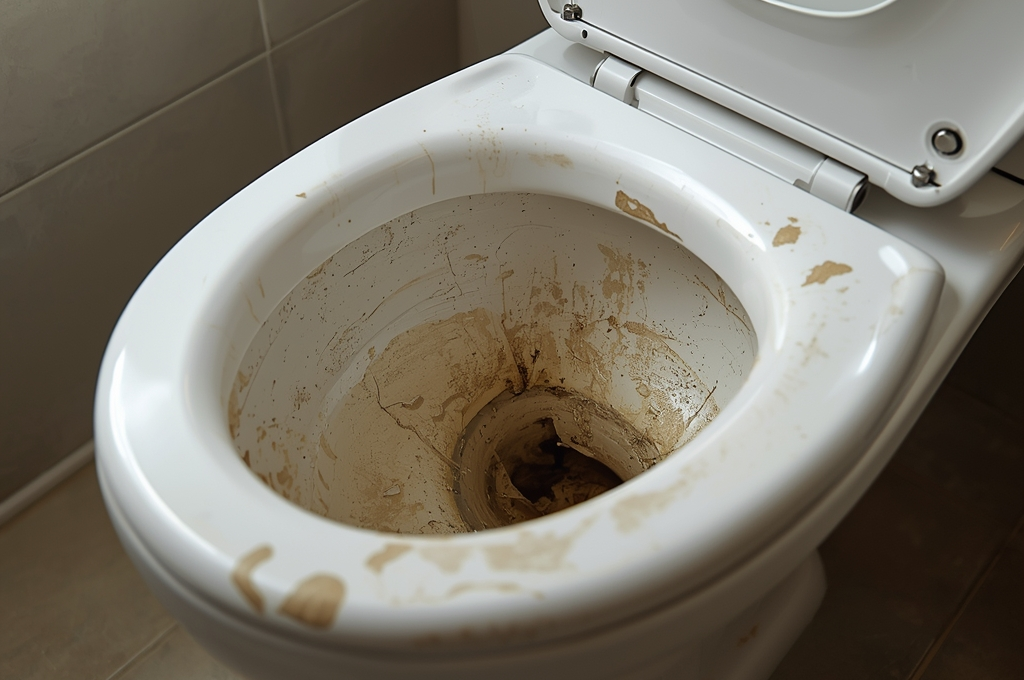


Struggling with stubborn toilet limescale that won’t budge? Learning how to remove toilet limescale effectively can transform your cleaning routine. Those unsightly brown marks are oxidized limescale deposits, and this guide will show you how to remove toilet limescale in minutes using a revolutionary acid method.
If you’ve tried everything from bleach to overnight vinegar soaks without success, this comprehensive guide will change your approach to remove toilet limescale forever. We’re sharing a powerful technique to remove toilet limescale that can eliminate even the most stubborn buildup in minutes, not hours, plus everything you need for long-term prevention.
How to Remove Toilet Limescale: The Science Behind the Stains
What exactly is limescale? Limescale is a buildup of mineral deposits from hard water that creates chalky, off-white, yellowish, or brown stains inside toilet bowls. Hard water contains high levels of minerals that leave deposits clinging to toilet bowl surfaces over time. According to the U.S. Geological Survey, hard water affects over 85% of US homes. Unlike regular dirt, limescale feels rough or grainy to the touch and results from these minerals collecting and hardening.
Why limescale becomes a bigger problem: Limescale not only looks unsightly but can also trap other dirt, making stains even worse. If left untreated, these deposits create an ideal environment for mould to thrive on the rough surface that limescale creates. This combination makes cleaning more challenging and can lead to unpleasant odours.
The escalation effect: Limescale stains may seem harmless initially, but they worsen and harden over time. Regular cleaning often does not remove these mineral deposits effectively. Hard deposits that have built up over weeks or months require a completely different strategy than regular maintenance cleaning. Sometimes mould grows alongside limescale, making the problem compound and requiring you to tackle both issues simultaneously.
Why Traditional Methods Fail to Remove Toilet Limescale
Most people struggle to remove toilet limescale because they unknowingly dilute their cleaning products. When you pour vinegar or acid-based cleaners into a toilet bowl full of water, you immediately reduce their effectiveness by 70-90%. This explains why traditional methods to remove toilet limescale often produce disappointing results.
Common challenges with stubborn stains: We may try to remove limescale with regular toilet cleaners, but these products often fail against mineral deposits. Scrubbing alone isn’t enough for hard deposits. The right strategy combines chemical dissolution with proper technique.
Identifying Your Enemy: Toilet Limescale vs. Other Toilet Stains
Before tackling the problem, it’s crucial to identify what you’re dealing with. Many homeowners waste time and effort using the wrong cleaning approach for the wrong type of stain.
Recognizing Limescale Buildup
Toilet limescale cleaning begins with proper identification. Limescale appears as chalky, off-white, or yellowish stains in the toilet bowl, often found clinging to the waterline or under the rim. These hard deposits feel rough or grainy to the touch and can look similar to other stains, but limescale has distinctive characteristics. If you see hard, crusty spots around the flush holes or at the bottom of the toilet bowl, it’s usually limescale.
Distinguishing Between Different Stain Types
Limescale characteristics: Pale, hard deposits that flake off in small pieces when gently scraped Rough or grainy texture when touched Usually white, off-white, yellowish, or brown when oxidized Commonly found around waterlines and under toilet rims
Mould identification: Usually black, green, or brown coloration Grows in damp, dark spots and has a fuzzy texture Feels slimy and often has a distinct musty smell Will smear or spread when scraped instead of flaking off
Other common toilet stains: Rust stains, Orange or brown coloration, typically forming near metal parts. Bacterial stains, Pink or red color that feels slippery to the touch
Tools and Techniques for Accurate Identification
Quick identification test: Use a wet pumice stone to gently rub a suspected area while wearing gloves. If the deposit chips off as powder or small flakes, it’s likely limescale. Use a flashlight to inspect under the rim and in shadowed spots for hidden stains that might be missed in regular lighting.
Examining the toilet bowl regularly helps spot limescale before it becomes a major problem. If stains come back quickly after cleaning, hard water is likely contributing to rapid limescale buildup.
Essential Tools for Effective Limescale Removal
The game-changer: Wet and dry vacuum – This is absolutely essential for the water-removal technique that makes everything else work. A shop vac works perfectly for this purpose.
Chemical options by effectiveness: Brick acid (pH ~2) – Works fastest but requires strict safety measures White vinegar – Natural alternative that works with the same technique but takes longer Acidic toilet cleaners with citric or hydrochloric acid for specialized mineral removal
Physical cleaning tools: Toilet brushes with stiff bristles – Essential for reaching under the rim and addressing hidden deposits Pumice stone – Must be used wet to prevent scratching; excellent for stubborn mineral deposits Scrubbing pads – For additional cleaning power when needed
Safety Equipment (Non-Negotiable)
Personal protection: Rubber gloves – Protect hands from chemicals and germs Eye protection – Even sunglasses provide basic protection from splashes Proper ventilation – Critical when using strong acids or removing water seals. The Centers for Disease Control and Prevention emphasizes the importance of proper ventilation when using cleaning chemicals.
Additional supplies: Tissue paper – For treating rim deposits where brushes can’t reach effectively Old towels – For cleaning up splashes and protecting surrounding areas Flashlight – For thorough inspection of hidden problem areas
Cleaning Products for Different Approaches
For immediate results (minutes): Brick acid provides the fastest dissolution of limescale deposits for urgent limescale removal toilet situations, but requires careful handling and safety precautions.
For gentler approaches (hours to overnight): White vinegar serves as a natural alternative that works with the same water-removal principle but requires longer contact time.
For natural cleaning preferences: Mixing baking soda with vinegar creates a fizzing reaction that helps loosen deposits. This combination is particularly useful for those who prefer less harsh chemicals while still achieving effective results.
For persistent cases: Descaler gels or powders are specially formulated to cling to bowl surfaces, allowing active ingredients to work on thick limescale layers over extended periods.
Water-Removal Method: Step-by-Step
Phase 1: Preparation and Safety Setup
Safety first: Ensure your bathroom has excellent ventilation before beginning. Put on rubber gloves and eye protection. Keep the area clear of children and pets, and never mix different cleaning chemicals. Have all your tools within easy reach.
Gather your supplies: Wet/dry vacuum, chosen acid or vinegar, toilet brush, pumice stone, tissue paper, and towels for cleanup should all be readily accessible.
Phase 2: The Critical Water Removal Step
The breakthrough technique: Use your wet and dry vacuum to remove all water from the toilet bowl. This single step separates success from failure – it allows acids to work at full strength rather than being immediately diluted.
Important safety consideration: Removing the water seal may temporarily allow sewer gases to enter the room, so ensure excellent ventilation is in place. This exposure is brief since you’ll be adding your cleaning solution immediately.
Phase 3: Acid Application and Observation
For brick acid users: Pour the acid into the empty bowl, filling it to the normal water level. You’ll witness an immediate and dramatic reaction – limescale deposits will literally start dissolving and falling off the porcelain. It’s quite remarkable to watch years of buildup disappear before your eyes.
For vinegar users: Fill the empty bowl with undiluted white vinegar. While this method takes significantly longer (overnight versus minutes), the same water-removal principle dramatically improves its effectiveness compared to traditional soaking methods.
The visual evidence: With brick acid, results become visible within 2-3 minutes. The fizzing and dissolving action provides immediate feedback that the method is working effectively.
Phase 4: Strategic Scrubbing Technique
Gentle but effective approach: After the initial soaking period (2-3 minutes for acid, longer for vinegar), use your toilet brush to scrub the bowl gently. Focus particularly on areas with stubborn limescale deposits, especially the often-neglected area under the rim. Be careful to avoid splashing since you’re working with strong chemicals.
Pumice stone application: For deposits that remain after initial treatment, employ a wet pumice stone with gentle pressure. The pumice’s abrasive texture physically removes hard deposits without damaging porcelain when used correctly. Always keep the pumice wet during use.
Progressive treatment approach: For extra-tough stains that resist initial treatment, apply more cleaning solution, wait an additional 15 minutes, then scrub again. Some heavily mineralized deposits may require this repeated approach for complete removal.
Phase 5: Comprehensive Rim and Hidden Area Treatment
Tissue paper technique: For limescale deposits around the rim where brushes can’t reach effectively, soak tissue paper in your cleaning solution and compress it against the affected areas. Allow this to sit for approximately 10 minutes to dissolve those hard-to-reach deposits.
Thorough inspection process: Use your flashlight to examine all areas systematically, paying special attention to spots under the rim and around flush holes where limescale commonly accumulates but often goes unnoticed.
Phase 6: Assessment and Completion
Initial evaluation: Flush the toilet while keeping the brush inside to rinse both the bowl and the brush simultaneously. This allows you to see your progress clearly. Most people are amazed at how much limescale disappears after just one properly executed treatment.
Repeat if necessary: For heavily soiled toilets, such as the year-uncleaned rental property in our case study, you may want to repeat the entire process to achieve complete removal.
Final touches: Conduct a thorough inspection to ensure all stains and deposits are completely eliminated. Clean any splash areas outside the bowl with a damp towel to leave everything looking fresh and clean.
Professional Limescale Removal vs. DIY Methods
Enhanced Traditional Methods
Improved vinegar approach: Even when using gentler vinegar, the water-removal technique dramatically improves results. Remove water first, pour in undiluted vinegar, and allow overnight soaking. This method works especially well for those who prefer natural cleaning solutions.
Baking soda enhancement: Combining baking soda with vinegar creates an active fizzing reaction that helps mechanically loosen deposits while the acid works chemically. This approach provides a middle ground between harsh chemicals and purely natural methods.
Specialized Situations
Addressing mould alongside limescale: When mould grows alongside limescale (which happens frequently), use diluted bleach solutions with proper ventilation to tackle the biological component. The CDC’s guidelines on mold prevention recommend addressing moisture issues promptly. Combine this with pumice stone scrubbing for comprehensive cleaning that addresses both mineral deposits and organic growth.
Commercial product applications: Specialized descaler gels and powders are formulated to cling to vertical surfaces, allowing their active ingredients to work effectively on thick limescale layers over extended contact periods.
Comprehensive Prevention Strategy
Daily and Weekly Maintenance
Basic maintenance routine: Regular limescale removal toilet maintenance involves cleaning with a toilet brush and mild bathroom cleaner weekly, paying particular attention to the waterline and under-rim areas where limescale typically begins forming. This prevents small deposits from becoming major problems.
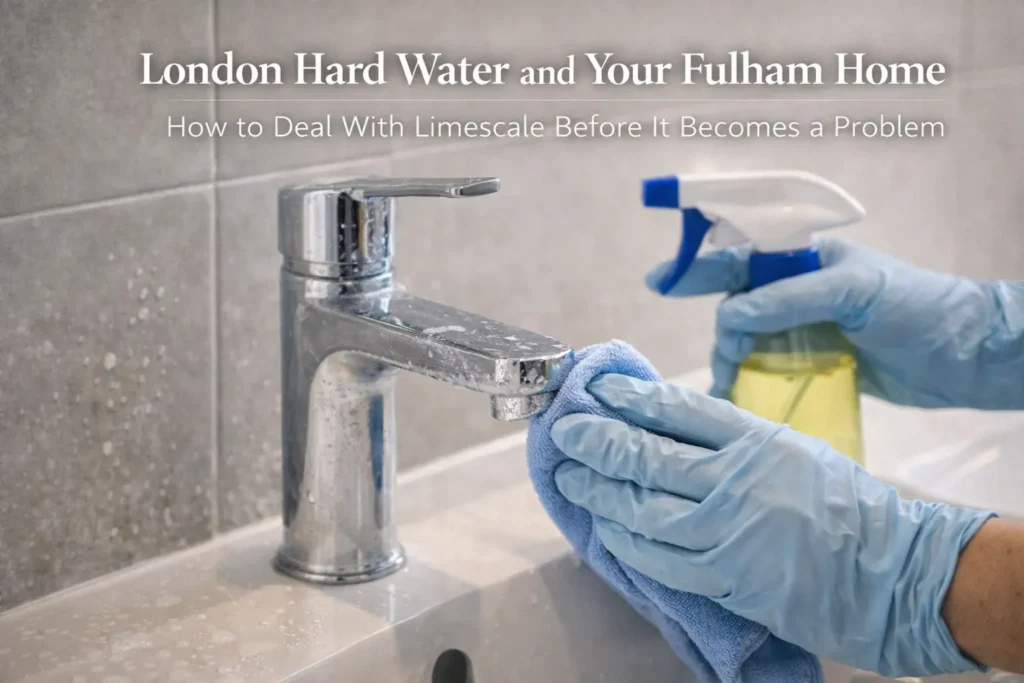
Targeted prevention for hard water areas: If you live in a hard water area, add a cup of white vinegar to the bowl weekly and let it sit for 30 minutes before scrubbing. This simple habit prevents the formation of those chalky limescale streaks that become so difficult to remove once established.
Monthly and Long-Term Strategies
Monthly deep prevention: Use the undiluted vinegar technique monthly as a preventive measure, applying the same water-removal method for maximum effectiveness even in maintenance mode.
Professional cleaning support: For busy homeowners in the Fulham area, consider scheduling weekly or biweekly professional cleaning services that include specialized limescale prevention as part of their routine bathroom maintenance. You can book professional cleaning services to maintain the prevention schedule while you handle deep treatments as needed.
Infrastructure considerations: Regularly check your toilet’s flush mechanism and water flow. Weak flushing can allow mineral deposits to linger and encourage limescale formation. Address any mechanical issues promptly.
Environmental controls: Keep toilets as dry as possible between uses, as moisture encourages both limescale and mould growth. Fix any leaks immediately, and consider bathroom ventilation improvements if moisture is a persistent problem.
System-wide solutions: For homes with persistent hard water issues, consider installing water softeners or using specialized in-tank tablets designed to reduce mineral deposits at the source. The Water Quality Association provides comprehensive information about water hardness solutions.
Tank Maintenance
Hidden limescale prevention: Don’t forget that limescale can accumulate in toilet tanks, affecting both appearance and mechanical function. Pour vinegar into the tank every few months and let it sit before flushing to dissolve deposits in these hidden areas.
Advanced Troubleshooting and Problem-Solving
Common Challenge Scenarios
Rapid limescale return: If stains reappear quickly after cleaning, this typically indicates hard water causing accelerated mineral buildup. This situation calls for water treatment solutions and more frequent maintenance cleaning schedules.
Equipment-related issues: If your pumice stone is causing scratches, ensure you’re using it wet, testing on hidden areas first, and applying only gentle pressure. Focus exclusively on limescale deposits rather than general bowl surfaces.
Method effectiveness concerns: If the vinegar approach isn’t producing expected results, verify that you’re achieving complete water removal and using undiluted vinegar. The success of this method depends entirely on proper acid concentration.
Advanced Maintenance Considerations
Tool care and storage: Store cleaning tools like toilet brushes and pumice stones in clean, dry locations to prevent mould and bacteria growth that could reintroduce problems.
Whole-system thinking: Address bathroom-wide moisture issues that contribute to both limescale and mould formation throughout the space. Sometimes toilet problems are symptoms of larger environmental issues.
Quality assessment: Regularly evaluate the effectiveness of your prevention routine and adjust frequency or methods based on your specific water conditions and usage patterns.
The Science Behind the Success
Chemical Principles at Work
Dissolution chemistry: Limescale consists primarily of calcium carbonate, which dissolves readily in acidic solutions through a straightforward chemical reaction. According to research published in the Journal of Environmental Management, the key factor is achieving sufficient acid concentration to drive this reaction effectively.
Concentration effects: When acids are diluted by toilet water, the reaction rate slows dramatically, requiring much longer contact times to achieve the same level of dissolution. Full-strength acid works in minutes; diluted acid requires hours.
Physical Removal Dynamics
Mechanical action benefits: Combining chemical dissolution with appropriate physical scrubbing removes loosened deposits more effectively than either approach used alone. The chemical action weakens the deposits, while mechanical action removes the dissolved material.
Surface considerations: Understanding porcelain properties helps in selecting appropriate tools and techniques that remove deposits without causing surface damage that could provide new sites for future buildup.
Safety Protocols and Best Practices
Essential Safety Measures
Personal protective equipment: Always wear disposable gloves and eye protection when working with any acidic cleaning solutions. Ensure proper ventilation before beginning work and maintain it throughout the process. The Environmental Protection Agency provides guidelines on safe cleaning product usage.
Chemical handling protocols: Never mix different cleaning chemicals, as this can create dangerous reactions. Store all cleaning products safely away from children and pets, and be aware of the pH levels and strength of products you’re using.
Emergency preparedness: Keep water available for emergency flushing of skin or eyes in case of accidental contact. Know the location of ventilation controls and have a plan for rapidly improving air circulation if needed.
Equipment Safety Guidelines
Pumice stone protocols: Always wet pumice stones thoroughly before use and test them on small, hidden areas first to verify they won’t cause surface damage. Use gentle pressure and focus exclusively on limescale deposits.
Vacuum safety: Ensure your wet/dry vacuum is appropriate for the intended use and properly maintained for safe operation throughout the cleaning process.
Long-Term Toilet Health and Maintenance
Building Sustainable Habits
Routine development: Create cleaning schedules that prevent limescale accumulation rather than simply reacting to heavy buildup after it occurs. Prevention is always more effective and less labor-intensive than remediation.
Investment in quality tools: Quality cleaning tools that are properly maintained provide better long-term results and safer operation compared to cheap alternatives that may fail when you need them most.
Knowledge application: Understanding the principles of limescale formation helps you predict problem areas and prevent issues before they develop into major cleaning challenges.
Cost-Effectiveness Considerations
Prevention versus remediation: Regular maintenance using these techniques costs significantly less in time, effort, and materials than dealing with severe limescale damage or, in extreme cases, toilet replacement.
Product efficiency: Using cleaning products at their proper concentrations reduces waste and improves results per application, making your cleaning efforts more economical overall.
This comprehensive approach transforms toilet cleaning from a frustrating, time-consuming chore into a quick, effective process. By understanding both the science behind limescale formation and the techniques for its removal, you gain complete control over this common household challenge. The combination of proper water removal, appropriate chemical treatment, correct tools, and strategic prevention creates a powerful system that maintains consistently excellent results with minimal ongoing effort.